Lawn
If there’s an existing lawn, there are a few ways to deal with it.
With the method of soil preparation I’ll be using, called double digging, I remove the grass first.
First, it’s best to mow it fairly short. Then, here are some common ways to get rid of a lawn:
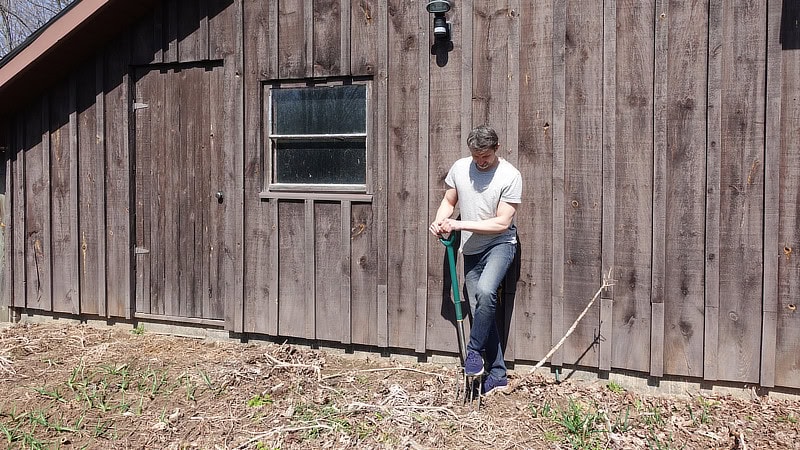
- Spade. It’s hard work, scraping off the top inch or so of soil and grass, and it doesn’t even get rid of all the roots, but it’s low-tech, so it’s often what I do.
- Sod cutter. Similar to the above, but the machine, which you can rent from an equipment rental place, does most of the work for you.
- Rototiller. You need a heavy-duty tiller to break up a lawn, and even then, it usually takes a few passes. After that, you can rake off some of the grass, and some of it will remain in the soil.
- Solarizing. This only works during hotter times of year. Cut the grass short and place a sheet of clear plastic, 1-4 millimetres thick. Cover the perimeter with something to keep the heat and moisture in. Wait 1-2 months.
- Smothering. Place overlapping layers of newspaper, cardboard, landscaping fabric, or black plastic to block out the sun entirely. Weigh them down so they don’t blow away. This may take 2-3 months, but it kills most of the grass.
If you remove the grass, it would ideally be put into a compost pile so that you can eventually return the topsoil and organic matter to the soil.
Weeds
If you have weeds growing, you may want to address them first.
If there aren’t many weeds, you can prepare the bed using any of the methods I’ll share, and they’ll be incorporated into the soil.
But if there are a lot of weeds, I remove them with a hoe, and then I either leave them on the soil surface as mulch when I’m done digging, or I move them to a compost pile. Most weeds are good for the soil, so it’s okay to leave them even if some of them end up taking root again.
Or if they’re particularly troublesome weeds like English ivy, kudzu, or bindweed, I remove as much of them as I can, root and all, with the help of a garden fork.
Soil Testing
Soil testing is beyond the scope of these lessons, but I do want to mention it because if your goal is to grow your own nutrient-dense food, soil testing will eventually become part of the puzzle.
Using a clean shovel, take at least a few samples of soil from around your garden, mix them together in a clean container, and send 1-2 cups to a soil lab. I prefer to use an organically minded lab, which typically means mailing the sample outside of your area.
The lab will identify the excesses and deficiencies of the main elements in your soil, along with fertilizer recommendations to help bring things towards balance. The cost of the labs I use is approximately $25 for a basic test, $25 for more comprehensive testing, and an additional $25 for their recommendations.
On top of that, you can get into biological testing to look at the balance of bacteria, fungi, and other microorganisms in your soil, which is also important for soil health. That’s another $25 to $50.
Some people are reluctant to spend this money up front, and that’s okay – it’s never too late to test.
“Soil organic matter” is plants, animals, and microorganisms, some of them living, but most at various stages of decomposition.
Organic matter constitutes a small portion of the soil, yet it plays many important roles.
Compost
Compost is made of organic materials that have been broken down for weeks, months, or years until they resemble something akin to dark soil.
Those organic materials may have included grass clippings, leaves, food scraps, manure, straw, wood chips, and pretty much anything that was once a plant or animal.
Good compost is rich in nutrients and contains beneficial microorganisms. It looks good and smells good.
Bad compost may contain garbage and harmful microorganisms. Sometimes, it looks and smells bad, but sometimes it resembles the good stuff. That’s why you may want to eventually make your own so you can control the ingredients and the process.
In the meantime, the best way I know to find good compost is to ask around. You may find it at a garden center, a dedicated composting center, a mulch/soil supplier, or even a local farmer.
You can also buy compost in a bag, which is easier than buying in bulk, albeit much more expensive. You can even buy it online, although I’ve found it to be much lower in price at a garden center.
A common suggestion is to spread a 1/2-inch thick layer of compost, but even 1/16 of an inch is very helpful if the compost is good.
A cubic yard of compost typically costs $30-$60 (although it can be obtained for as little as free and as much as $100). When spread at 1/2 inch thick, it will cover about 650 square feet. When spread at 1/16 inch, it will cover about 5000 square feet. It goes a long way.
If you buy it in bags and spread it at 1/2 inch thick, that’s about 1 litre (1.5 pounds) per square foot. When spread at 1/16 inch thick, that’s 1 litre per 8 square feet.
Mulch
Regardless of how you prepare the soil, mulching is almost always worthwhile.
A good mulch feeds the soil, protects the soil from rain/wind/sun, and blocks weeds.
My favourite mulch that does all of the above is leaves. In the fall, you can collect them from your property and put them on your beds.
I often pile them 6 inches high. They partially break down over the winter. In the spring, they need to be raked aside in places where you sow seeds, and then you can gradually bring them back underneath the seedlings, although with some crops, I end up planting so densely that there’s not much room for mulch.
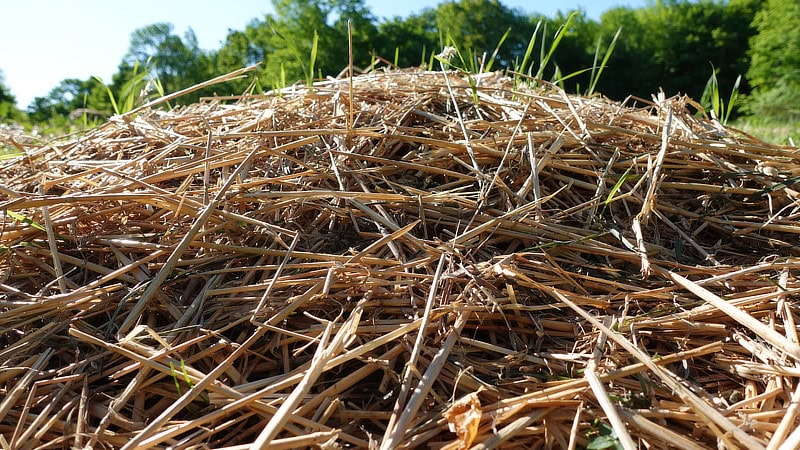
If you don’t have leaves, straw is a reasonable substitute. I’ve often found bales of straw in online classifieds from local farmers, as well as at hardware stores and garden centers.
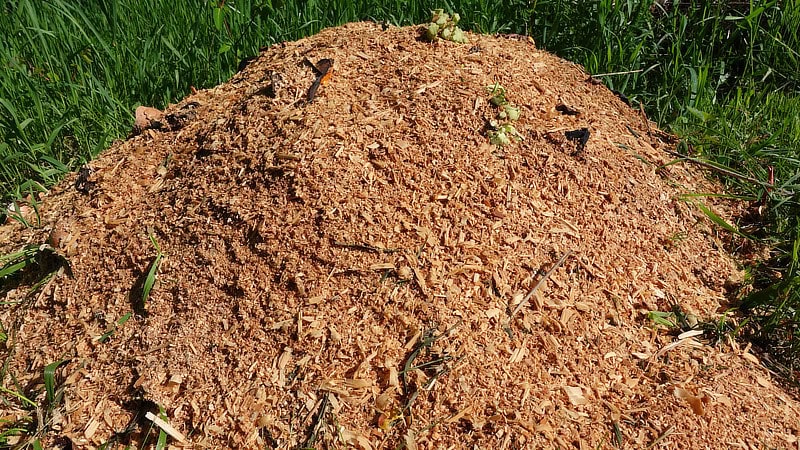
Wood chips can be an okay mulch, too, especially under trees and shrubs. In a vegetable garden, I find leaves and straw easier to manage.
Before we can plant, we usually need to work on the soil.
It’s conceivable that your soil has such great natural fertility that little needs to be done. However, to dramatically improve your chances of success, I’ll show you how to prepare a garden bed in a way that has been proven to produce big yields in a small space.
I’ll also mention some other options you could use instead.
We prepare the soil to make it easier for seeds to germinate and grow, and for planted plants to become established and start forming roots.
We also want that soil to have a good balance of water, air, nutrients, and beneficial biology.
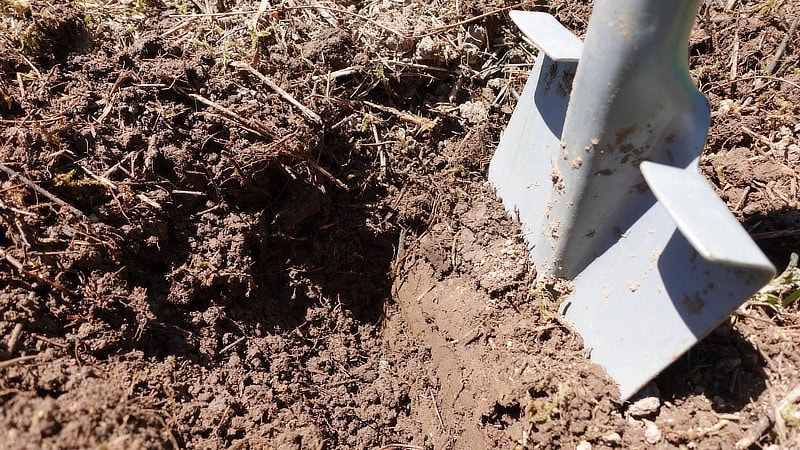
Today, I’m using an established method called deep soil penetration, also known as double digging, because, with just a shovel and a garden fork, I can prepare the soil for planting and promote unencumbered root growth right away.
A double-dug soil will capture, retain, and drain water well.
It will have sufficient air space to support roots and beneficial soil organisms. Soils lacking sufficient air tend to promote the growth of organisms that are harmful to plants.
Some other options:
The first is tilling with a gas-powered machine. Most home tillers go 3-6” deep, although some can get 8” down. This is similar to digging by hand, but you can’t go nearly as deep with a tiller, and proponents of double digging say it’s less hard on soil structure and biology. That said, it is a fast and easy way to prepare a large area of soil for planting, so I understand why some people prefer it. Back when I was installing gardens for clients, I used a tiller because time was of the essence.
The second method is sheet mulching, which is where you lay down a thick layer of organic materials, 12-24 inches thick, often starting with a layer of cardboard or newspaper to block the grass/weeds and then piling on some combination of materials like manure, straw, leaves, and grass clippings. That can be an excellent option if you have 6-24 months to wait for it to become usable. And there are even a couple of things you can grow there in the meantime, the common one being potatoes.
The third method is to buy some topsoil, 2-way mix, or 3-way mix and put it right on top of your soil, making a raised bed perhaps 6-12” high. I don’t love 3-way mix because it usually contains peat, a non-renewable resource that isn’t particularly useful in the soil. My preference would be a 2-way mix of topsoil and compost, whether you buy it already mixed or make it yourself with a 75% topsoil and 25% compost ratio. You can use boards, rocks, or any other materials to keep the soil within a defined area. Alternatively, if the soil is moist and not too high, it may retain its shape without support.
Here’s what you’ll need…
Tools:
- A shovel for digging.
- A pickaxe for especially hard soils.
- A garden fork for deeper soil penetration.
- A hard rake (aka bow rake) to level out the bed.
Optional preliminary steps:
- Water. We want the soil to be moist but not too wet. If it’s dry, water it the day before or in the morning. If it’s saturated with water, wait until it’s not, because working wet soil can cause problems.
- Remove weeds. You don’t necessarily have to remove weeds, but if there are some you want to get rid of, now’s the time.
- Spread compost. 1/2 inch thick is plenty. That’s about 1 litre (1.5 pounds) per square foot. You can use up to 1 inch, but even 1/16 inch (1 litre per 8 square feet) is incredibly helpful.
- Spread fertilizers. If you conduct a soil test, you can apply fertilizers based on the results of that test. If you didn’t do a soil test, you could apply a broad-spectrum fertilizer. Or you can wait until later to fertilize. I’ll discuss fertilizers more in the maintenance section.
Now, here’s how to prepare your bed:
- Starting at one end, with a shovel or garden fork, dig a trench about 12 inches wide and 12 inches deep, going across the width of your bed and put that soil into a wheelbarrow or otherwise out of the way. We’ll save it for later. If you can’t dig 12 inches, do what you can. Even 6 inches is worthwhile.
- With a garden fork, loosen the soil in the bottom of that trench. Ideally, we do this a further 12 inches deep, although some soils are so compacted, it can be tough to get that deep. Again, 6 inches would still be worthwhile.
Now, continue digging trenches down the bed, but this time, you can simply move the soil from each trench into the previous trench.
From here, we keep going. We loosen the soil in our new trench and then start again with a new trench beside it.
And so on, until we have a trench at the end of the bed. Some of the soil we saved from the first trench could go into the last trench, although you may find the bed is now so elevated due to the digging that you don’t need any of it, i.e., there’s often enough soil to fill the last trench just by raking the entire bed with a hard rake. In that case, you can instead keep some of it for other projects or to incorporate into a compost pile.
Some people do this every few years or even more often. I just do it once.
I’ve been donating to Thrive since 2013.
If you’d like to do that for someone, you can donate below. Thank you!