Most soils have at least some of each element plants need, but many soils don’t have enough of each element or the right balance of elements to grow optimally healthy plants.
You can get an idea of the fertility of your soil by sending a sample to a soil lab. Based on their analysis, you can apply the deficient elements to the garden. It is very worthwhile to do this to improve soil health as well as plant health, nutrient density, and flavour.
But even without a soil test to guide us, there are things we can apply in small amounts that don’t supply too much of any one element and so won’t cause any excesses.
Compost is a great start, and we don’t need much. 1/2” spread out over a bed before digging, or even dusted on the surface during the growing season, is usually more than enough.
You can also make your own liquid fertilizer by combining a mixture of weeds and fresh grass clippings in a container, filling it with water, covering with an air-tight lid, and leaving it for a few days or, even better, a few weeks.
I do this regularly, the only downside being that unless you get weeds from other places, you’re only bringing in the nutrients that are already abundant in your soil, not the ones you need the most.
For this reason, I use several broad-spectrum fertilizers, most of which are derived from the ocean, including seaweed fertilizer, sea mineral fertilizer, and fish fertilizer. There are similarities between them, but each brings its own benefits, so I use them all. If you live near the ocean, you can make your own. Otherwise, you can buy them.
Most gardeners focus on fertilizers (let’s call that the chemistry of the soil), but just as important is the life in your garden (the biology).
“Microbial inoculants” bring that biology, the beneficial microorganisms that are often deficient in the garden for various reasons. We need that biology to feed our plants and protect them from diseases.
The primary method for incorporating this biology is, again, a small amount of high-quality compost.
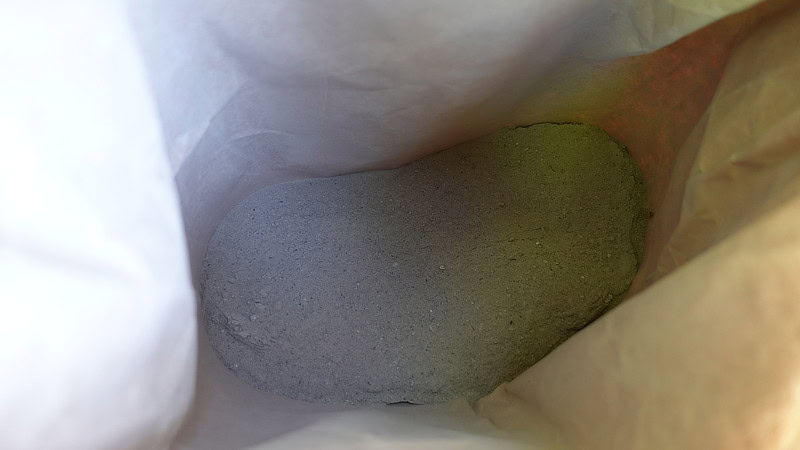
And then there are products. My favourite is called Effective Microorganisms, a liquid mixture of fermenting microbes that was formulated in Japan in the 1970s and early 1980s and is now used worldwide.
If possible, it’s a good idea to apply small amounts of broad-spectrum fertilizer and beneficial microorganisms regularly, rather than applying everything at once in the spring.
I come through at least monthly and sometimes weekly – especially useful during late spring and summer when plants are growing the most.
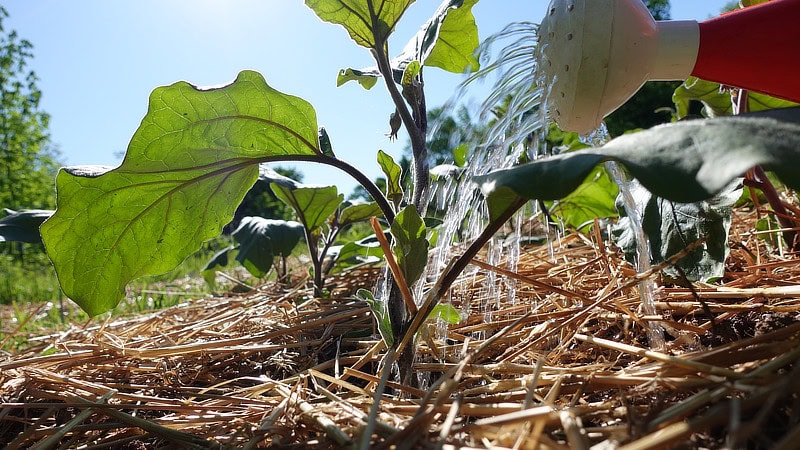
Just like us, plants need water to live.
In nature, they’re watered by rain. You can approximate that in the garden with a hose, sprinkler, or even a simple watering can.
That said, some plants are more disease-prone than others, like the tomato and squash families, and they’ll be less likely to get disease if their leaves stay dry.
In a humid climate, plants may benefit from being spaced further apart to allow for more airflow among the leaves. You may also consider watering the soil instead of watering from above, whether using a watering can, drip irrigation, or a soaker hose.
Or you may water in the morning, allowing the sun’s rays to dry the leaves.
If you use a drip or soaker hose, you still want to water the entire soil area, rather than just watering around the plant. In these lessons, the whole soil area is covered by plants, but even for people who plant in rows with big spaces in between them, the roots eventually go out into those rows, too, so as long as you have sufficient irrigation water, there should be water applied there.
One benefit of planting intensely is that the plants cover the soil, decreasing evaporation. That, partnered with a mulch, will help you conserve water.
As for how much water to apply, you may come across the rule of thumb that suggests applying 1 inch of water per week. That may be a little much, but it may be okay during the heat of summer. It works out to about 60 gallons per 100 square feet.
My own rule of thumb is 1/3 inch (20 gallons per 100 square feet) per week during spring and fall and 2/3 inch (40 gallons per 100 square feet) per week during summer.
If my hose puts out 8 gallons per minute, that’s just 2.5 minutes per 100 square feet in spring and fall and 5 minutes in the summer. Again, that’s per week. But every hose is different, and once you start exploring various irrigation accessories, that changes things.
A rain gauge will help you figure out how much water you’re applying, at least for overhead watering methods like a hose, sprinkler, or watering can. Ideally, we set up at least a few gauges (or straight-sided cups) around the garden to determine how long it takes us to apply that 1/3 inch or what have you.
Ultimately, the amount to apply depends on the temperature, wind, humidity, and sun exposure.
Sandy soils don’t hold as much water, so they require more frequent watering, with less water each time, typically 2-4 times per week. Clay soils hold a lot of water, so to get the water down deep, we supply a greater amount of water each time, but then we wait longer between waterings, typically once or twice a week.
Of course, when you get a good rain, that will also decrease your watering needs. A rain gauge will tell you how much rain you got (it’s hard to guess).
With new seeds and seedlings, we need to water more frequently, sometimes every day or two, because their roots don’t reach as wide and deep as they need to tap into the soil’s reserves. But as the roots grow larger, we gradually water more deeply and less frequently to encourage the roots to extend deeper, resulting in healthier plants.
The most important thing to know about pest management is that unhealthy plants get eaten by insects and diseases, while healthy plants don’t.
Not only can healthy plants defend themselves against pests, but even more interesting, plant-feeding insects and diseases evolved to consume nutritionally imbalanced plants, so they don’t even eat healthy plants.
Mammals are another story – they evolved to eat healthy plants. To keep rabbits, squirrels, deer, and others out, you need to find a way to block them. That often means some type of fencing, but may also involve chemistry (like cayenne pepper) and biology (a cat or dog).
But for plant-feeding insects and diseases, the primary goal is to enhance soil and plant health, thereby minimizing any problems they may cause.
This involves a combination of the topics we’ve been discussing in these lessons, including good compost and mulching, fertilizers, microbial inoculants, and appropriate watering.
That said, building good soil can take years, so in the meantime, you will likely see some issues with some plants.
For some insects, like an occasional caterpillar that’s eating your leaves, you can just pick it off. Caterpillars eventually turn into beneficial butterflies, so you may want to just relocate them rather than killing them.
But if you have an infestation, you may decide to use a pesticide, whether homemade or purchased.
I don’t use synthetic pesticides, not only because most of them are toxic to beneficial organisms (including plants and people), but also because they tend to make the situation worse in the long run. Even organic pesticides can cause issues if overused, but most of them are more benign, so when used sparingly, they can play a role.
The most common homemade pesticides are:
- Soap and water. 1 teaspoon of natural liquid soap (not detergent) per quart of water can be useful on its own, and is often recommended as an addition to the recipes below.
- Herbal tea. Add a mixture of herbs to a bucket and cover it with warm water. Put on an air-tight lid, stir it every 48 hours, and start using it after 7 days. Mix it with an equal part of water before spraying.
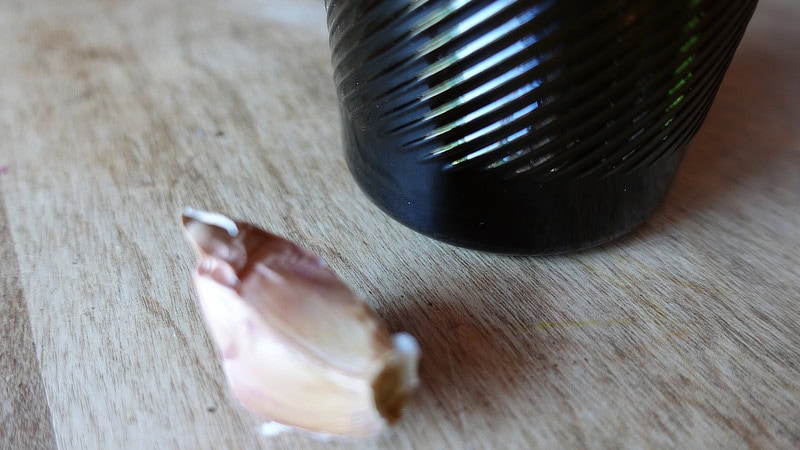
- Garlic. Crush 2 cloves of garlic and marinate them in 1 tsp of mineral/vegetable oil for at least 24 hours. Strain it and add 1 teaspoon of liquid soap, then mix well in 1/4 cup of water. You can keep this in the fridge for at least 2 weeks. When it’s time to spray, dilute this again in 1 quart of water and spray it on the plants in the morning, preferably on a non-sunny day so as not to burn the leaves.
All of these can be somewhat harmful to beneficial insects and microorganisms as well, so we spray them only on plants that require it.
The most common organic pesticides to purchase are:
- Microbial (made from microorganisms). One example is Bacillus thuringiensis (Bt), a bacterium that makes a protein that kills some insects.
- Botanical (made from plants). My favourite is neem oil, made from the seeds of the neem tree (Azadirachta indica).
- Horticultural oil. Made from petroleum (aka mineral oil) or plants like soy and canola.
- Insecticidal soap. Similar to liquid hand soap, but making use of plant oils with longer-chain fatty acids, like olive and canola oil, which are easier on plants.
The last thing to remember is that even if you do use any of the above, be sure to apply fertilizers and inoculants regularly to improve plant health, as this is the best way to prevent and control pest problems.
Now we get into one of the most rewarding parts of growing your own food.
In climates with cold winters, like much of the U.S. and all of Canada, most planting occurs in the spring, and most harvesting takes place in the summer and fall. In climates with mild winters, planting and harvesting can happen year-round.
In most climates, there may also be a smaller summer planting for a fall harvest, but here, I’m focusing on the main harvest.
If you buy your seeds and plants locally, the seed packets and plant labels should give you an idea of the expected harvest time for your area.
Going back to our main plant families, I’ll share the main harvest times for North America:
- Allium. Garlic, onion, scallion, shallot. Mostly harvested in the summer, but many of them are perennial, so if you leave some in the ground and mulch them over winter, you may be able to harvest some in spring and throughout the whole growing season.
- Amaranth. Beets are generally harvested in summer and fall. Spinach doesn’t like heat, so it’s often harvested in late spring, while chard can keep going throughout the summer. Amaranth is good for greens and seeds.
- Brassica. Broccoli, cabbage, cauliflower, kale. Harvested in summer, but doesn’t like heat, so the hotter the summer and the milder the winter, the more that harvest moves towards spring and fall, and even winter in the hottest climates.
- Cucurbit. Cucumber and zucchini early to late summer, winter squash late summer to fall, pumpkin in fall.
- Legume. Beans can be harvested all summer and fall if you plant them every couple of weeks during the spring and summer, peas are harvested in spring before it gets too hot (and fall if you plant a fall crop in late summer).
- Solanum. Eggplant, pepper, potato, tomato. Harvested from summer to early fall.
As for how to harvest, most leaves and fruits can be harvested by hand, simply snapping or twisting them from the plant, but often, a knife or scissors is easier and less damaging to the plant.
Leaves taste best when they’re younger, before the plant starts to flower, whereas fruits are best when they’re allowed to ripen fully on the plant.
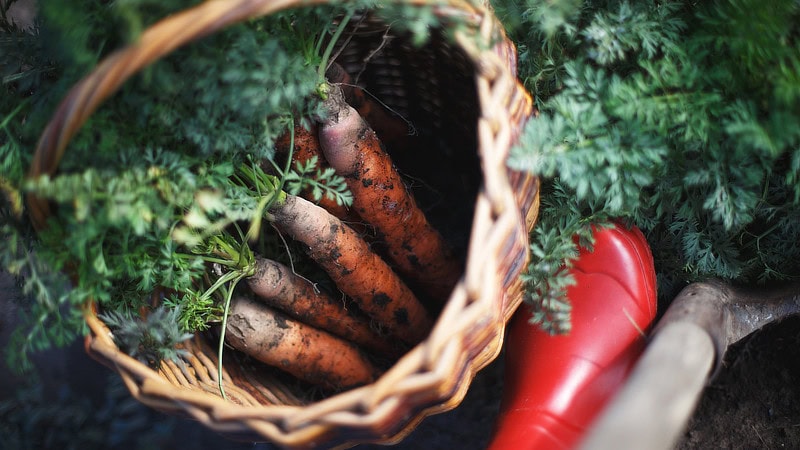
Roots may be pulled by hand, but a garden fork is often helpful.
There are a few plants that we can harvest all at once when they have largely died back, such as potatoes, dry beans, and winter squash, which can be stored for winter use.
But for most plants, it’s best to harvest them regularly, as soon as they’re ready, because they’re the most nutritious then and because harvesting them often causes them to produce more until the weather gets either too hot or cold for them (depending on the plant).
Many foods can be stored for many months, so you can keep eating some of your vegetables throughout the winter. But you need to create the right storage for each type of food. Some prefer it cold and moist, others warm and dry, while others want something in between. I won’t get into all of those details here, but it’s something you can learn as you go.
If you want to grow nutrient-dense food, planting your own saved seeds is part of that process because when you save seeds from the healthiest plants every year, the seeds will gradually become more adapted to your soil.
First off, you need to make sure you’re starting by buying mostly open-pollinated seeds rather than hybrids, since hybrids can’t be reliably regrown.
Next, some plants are self-pollinating, and they are much easier to save. Many of them are pollinated before the flowers even open, so they don’t cross-pollinate as readily.
But plants that are pollinated by insects or the wind are trickier because they’ll easily cross-pollinate with other plants within the same species. That means you get a hybrid, and the resulting plants, although sometimes interesting-looking, often don’t taste good. Saving seeds from plants in these families is more complicated. Seed producers must use meticulous isolation procedures, such as maintaining large distances or physical barriers, to prevent cross-pollination.
Let’s go back to our main plant families:
- Allium. Garlic, onion, scallion, shallot. Garlic doesn’t cross-pollinate. Onions, scallions, and shallots can cross-pollinate with each other.
- Amaranth. Beets and chard will cross-pollinate. Spinach is a distinct species, but it is pollinated by wind, so it often crosses with other spinach varieties.
- Brassica. Broccoli, Brussels sprouts, cabbage, cauliflower, kale. Will all cross-pollinate with each other.
- Cucurbit. Cucumbers will cross-pollinate with other cucumbers. Pumpkin, squash, and zucchini belong to several species, so they will cross-pollinate if they are of the same species. You need to do a little reading to figure out which ones will cross-pollinate (some pumpkins, for example, can cross with squash).
- Legume. Bean, pea. They are self-fertilizing, making them good candidates for saving.
- Solanum. Eggplants are self-fertilizing and don’t cross much, peppers hot and sweet will cross with each other, potatoes will cross with each other but we save the tubers, so it doesn’t matter, tomatoes are self-fertilizing but they may cross with insect pollination, so it’s best to plant just 1 variety if you want to save true seed (but who wants to plant only 1 tomato?).
- From other families. Corn will cross-pollinate. Lettuce is self-fertilizing and doesn’t cross-pollinate as readily.
Looking at that list, the easiest seeds to save are cucumbers, beans and peas, solanums (eggplants, peppers, potatoes, and tomatoes), and lettuces.
And yet still, it’s best to plant only 1 variety of each because cross-pollination can occur, or at least keep the varieties as far apart as you can.
You can save seed from all of the other plants, but again, you need to either have big distance between them (may be possible if you live in the country very far from neighbors) or physical barriers (beyond the scope of this lesson) or accept that you may get some weird broccoli-caulfilower cross that doesn’t taste great (I would still buy some broccoli and cauliflower seeds and plant them, too).
For the seeds you’re going to save, choose the healthiest plants. That may mean plants with the most growth, tastiest fruits, and highest yields. Be sure to take seeds from at least a couple of different plants to maintain genetic diversity.
Try to leave the seeds (or the fruits that contain them) on the plant to ripen for as long as possible before disease starts to set in, even beyond when you would usually harvest them for eating.
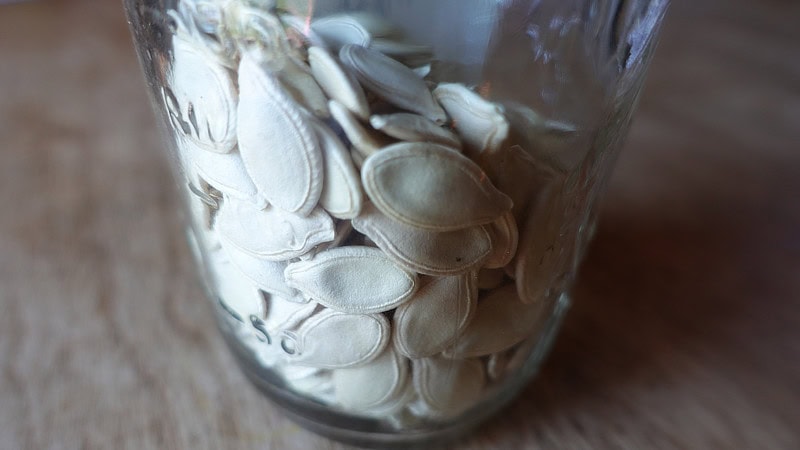
You can dry seeds on any surface, although a seed drying rack (bought or homemade) uses fine mesh to get more airflow around the entire seed.
When your seeds are dry enough that a fingernail doesn’t leave a mark, they’re ready for storage.
Store them in a cool, dark place in a glass or plastic jar. Label them carefully, including the year they were harvested.
It’s late autumn and the harvest is done.
It’s worthwhile to do a little work in the garden at this time of year. Sometimes, I even prepare new beds in the fall, as I now have more time, and the soil is usually not too wet.
On the other hand, if I’m going to prepare new beds in my lawn, I often wait until spring because I like having the grass there to nourish and protect the soil over winter.
For the same reason, I like to sow a cover crop in existing beds 4-8 weeks before my first autumn frost. I generally use a combination of several legumes (e.g. clover, vetch) and grasses (e.g. rye, oats). They all bring something a little different to the table, but overall, they protect and improve the soil over winter, suppress weeds, and provide homes for beneficial insects.
If the beds still have plants until frost, or if I otherwise don’t get around to sowing a cover crop, I mulch them heavily with the leaves that fall on the property, and if there aren’t enough leaves, I’ll volunteer to rake the neighbours’ leaves for them and take them off their hands. I’ll pile on 6” of leaves if I have them, but even an inch or two is better than leaving the soil exposed.
As for the remains of my vegetable plants, such as squash and tomato vines, I may move them into a compost pile, especially if I want to keep the garden looking tidy. However, often, I just let them stay right where they are. Their roots will continue to provide food and habitat for soil microbes, and when they die, they’ll simply become part of the mulch.
Then, in my climate, there are a few months of waiting until it starts all over again the next year, and I’m back to this cycle of preparing the soil, planning the garden, planting the garden, and maintaining it.
And that’s what I encourage you to do from here: make your own plan for preparing your soil, planning your garden, planting it, and maintaining it. Putting together a plan, even if it’s just 1 page, pushes you to think through a whole bunch of things, which will make the process go more smoothly when it’s time to get to work.
