A seedling is a small plant that was started from a seed several weeks earlier.
If you plan to grow just a few plants, you may decide to buy seedlings from a garden center or farmer’s market, so you don’t have to go through the process of starting your own from seed.
But the more plants you’re intending to grow, the more likely you’ll want to start them from seed yourself, partially to save money but also for the other benefits that come from using your own seed that you saved from last year.
You can buy seed from a local garden center, but the more you get into this, the more likely you’ll want to go right to the source – the seed companies growing the seed.
Most of them are now online, so you can order from their websites, and some of them will still mail you a physical catalogue if you prefer ordering the old-fashioned way.
Regardless, I still encourage you to buy local, which doesn’t necessarily mean your direct community, as there may not be any seed growers there, but it does mean seeds grown in a similar climate to yours. That could be your state/province, or your USDA plant hardiness zone, etc.
If you store your seeds at a cool temperature, in a dry location, and away from light, they can remain viable for 2-5 years or more, depending on the seed.
You may see some seeds that are labelled “open-pollinated” and others that are “hybrids.”
Hybrids are created by humans through the cross-pollination of two different species of plants from the same genus (e.g., two types of tomatoes) to combine the strengths of each.
(Hybridization is very different from genetic modification, which is a whole other level of intervention that is not allowed in organic farming and gardening.)
The main time you may decide to use a hybrid in a home garden is when you have a lot of trouble with a certain disease on a certain plant, and you find a hybrid that has been bred to be resistant to that disease.
The big downside of hybrids is that when the plant goes to seed, that seed usually reverts to one of its genetic parents, which usually isn’t very appealing. That’s why, with hybrids, you can’t save the seed and expect the same benefits next year.
Open-pollinated seeds are mostly pollinated by insects, birds, or the wind. Some of them are “heirloom” seeds that have been passed down for generations, often due to their exceptional benefits, such as superior taste or disease resistance.
The main advantage of open-pollinated seeds is that they reproduce true to type, allowing you to save them every year and plant them again the following year, thereby reaping the same benefits, saving money, and, importantly, enabling the seed to gradually adapt to your soil and climate conditions over time.
Then there’s organic. Although you could buy a non-organically grown seed and grow it organically, feeling good about what you’re eating, I always prefer to support those who are doing things without synthetic chemicals. The same goes for buying plants, although finding organic ones can be more challenging.
We may start seeds indoors to give them a head start on the growing season or to provide a more protected environment for them to begin their lives, away from pests and inclement weather.
The further you get from the equator, the more likely you need to start some things inside because your growing season may not be long enough for certain plants to bear fruit if they were directly sown outside.
During the growing season, you can continue to start some plants inside to make better use of space in the garden. When your lettuce is ready to be harvested, it’s nice to have a plant ready to take its place, rather than sowing seed directly and waiting weeks or months for it to be ready for harvest.
That said, starting seeds indoors is more work than sowing them directly in the garden, so when direct sowing is possible, I generally opt for that.
I’ll give you a list below, but note that from the “Start Indoors” list, there will be plants that some people prefer to sow directly outside, especially as you get closer to the equator, and from the “Start Outdoors” list, there will be plants that some people prefer to start inside. There’s some trial and error to figure out what works best for you.
Many of the “Start Outdoors” plants have delicate roots, so they don’t love being transplanted, which is one reason they’re often directly sown outside. That said, some gardeners start some of them inside to get an earlier harvest, avoid early pest damage, or if they have short summers that don’t allow enough time for plants to reach maturity.
Start Indoors:
- Brassica. E.g. Broccoli, cauliflower, Brussels sprouts, cabbage. Brassicas can be a little challenging, and they seem to do better when started indoors. Additionally, they typically require growth in the spring and fall when temperatures are cooler. Starting them indoors allows them to reach harvest size before the heat of summer or before the cold of winter for a fall crop.
- Solanum. E.g. Tomato, pepper, eggplant. This family tends to take a long time to bear fruit, so it’s best to start indoors to ensure the plants produce fruit before the fall weather gets too cold.
Start Outdoors:
- Cucurbit. E.g. Cucumber, zucchini, squash, pumpkin.
- Legume. E.g. Peas and beans.
- Root crops. E.g. Beet, carrot, potato, radish, onion, garlic.
- Corn.
Indoors or Outdoors (for these, many people like to start them inside, and many people like to sow them directly outside):
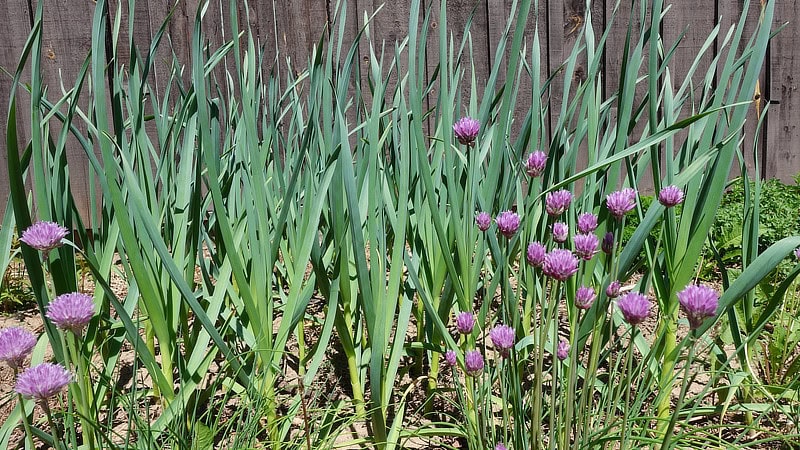
- Herbs. Most of these can be directly sown, but some people like to start them indoors.
- Greens. Lettuce, kale, spinach.
Some seeds are planted one inch apart, while others are planted two feet apart. Seed packets usually tell you.
As for depth, most seeds are planted just under the surface of the soil, slightly deeper than they are thick. For example, a beet seed is approximately 4mm wide, so it is planted about 4-6mm deep, i.e., with 4-6mm of soil on top of it.
For seeds that are planted close together, some people like to make a shallow trench with a trowel or even their finger.
For seeds that go further apart, like 6”, you may dig individual holes, or if your soil is particularly fluffy, which is generally the case if you’ve recently double dug the bed, you’ll be able to bury the seed directly with your fingers without doing any digging.
Sometimes, I find it better to water the soil before sowing the seeds, especially for tiny seeds, which are sown so shallowly that watering after can wash them all away. That said, sometimes it’s easier working with drier soil when sowing, in which case you can water after. Watering after also can help settle the soil.
You can use the soil that’s already in the bed to cover the seed. Just make sure it’s not a big chunk of soil – we want the soil on top of the seed to be more like a powder, so it’s easy for the root to grow down and the shoot to come up.
And then there’s planting.
Whether you’ve purchased some seedlings or grown them yourself, planting in the garden is easy.
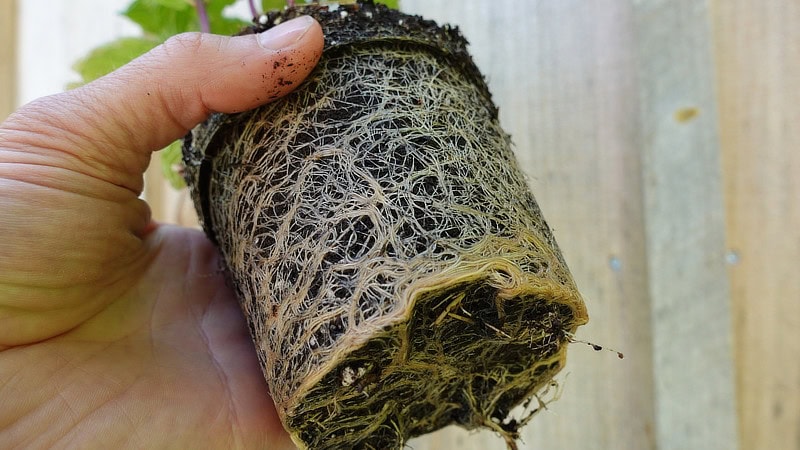
Gently remove the plant from the container without pulling on the plant itself. Sometimes, I can squeeze it out, but usually, a butter knife helps to remove it, like muffins from a muffin pan.
When you get it out, if the roots are root-bound (circling around the edges of the container due to having overgrown the container), tease them apart with your fingers or cut them with a sharp knife to help encourage them to grow out into the soil.
Then, you just dig a small hole. If you’ve already prepared your soil with compost and fertilizer, you don’t need to do anything special in the planting hole. In general, we want to amend the whole soil, not just the planting hole.
That being said, it’s okay to add a small amount of compost and/or broad-spectrum fertilizer/microbial inoculants during planting to ensure the plant has a favourable environment to start with. But don’t go overboard. I don’t want the rootball to be planted only in compost. That can cause problems.
Place the plant so that the top of the rootball is slightly deeper than the top of the soil, and use your hands to ensure the soil is firmly around the rootball.
Some people plant even deeper, so the plant’s lowest leaves are just above the soil. I do this for tomatoes, peppers, and the brassica family because it’s well established that they will develop more roots along the buried stem and be better off for doing so.
I suspect some other plants do the same, but some may be unhappy buried too deep, so with most plants, I only go slightly lower than soil level (side note: most trees and shrubs don’t want to be planted deeply, and indeed, in some cases, like clay soil that gets a lot of rain, we may plant them a little higher than the surrounding grade).
Unless the soil is already too wet for some reason, it’s usually good to water gently when you’re done planting to help settle the soil around the rootball.
Containers
There are many types and sizes of containers. As long as they have drainage, they can all work.
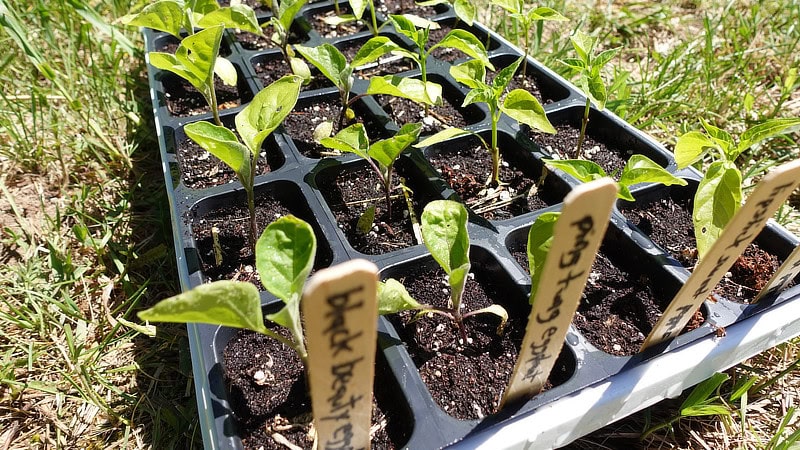
I mostly use small, plastic pots that are 2.5-3” wide and tall. I start a couple of hundred plants this way each year. It’s possible to use smaller containers that are more like 1-2” wide and tall. This makes more efficient use of space, with the compromise being a smaller root system. You could also use bigger containers, but that can be overkill. I find 2.5-3” to be about right for growing a seed for 4-8 weeks before planting it out.
I put these into a 10” x 20” tray to catch any water that drains out of the containers when I water them. Depending on the exact dimensions of the containers I’m using, I can usually get 20-30 containers into a tray.
Some people grow the plants all together directly in 10” by 20” trays and then gently tease each of them out with a popsicle stick or something similar. This is more space-efficient, so if I ever wanted to start more plants, I would consider that instead.
Soil
Using soil from the garden can work, but it has a higher failure rate because it’s often too heavy. Instead, you can buy seed-starting mix online or at a garden center or hardware store, and it works very well. I’ve used cheap ones and expensive ones, and they’ve all worked fine.
You can also make your own, although it may not be worth the time when you’re not starting many seeds. However, it can save you money when your garden grows larger, as well as giving you more control over the growing medium.
A simple recipe is 1/2 light soil or sand and ½ well-finished compost. Another common recipe is 1/3 topsoil or peat moss or coconut coir, 1/3 compost, and 1/3 sand, perlite, or vermiculite.
Seeds
As I wrote in a previous lesson, you can buy seed from a local garden center, but the more you get into this, the more likely you’ll want to go right to the source – the seed companies growing the seed.
Most of them are now online, so you can order from their websites, and some of them will still mail you a physical catalogue if you prefer ordering the old-fashioned way.
Regardless, I still encourage you to buy local, which doesn’t necessarily mean your direct community, as there may not be any seed growers there, but it does mean seeds grown in a similar climate to yours. That could be your state/province, or your USDA plant hardiness zone, etc.
Light
Unless you have a lot of direct sun coming through a window, which is rare in the winter, it’s worthwhile to have some supplementary lighting for your plants.
I use LED lights in the 5000-6500 Kelvin range. It’s quite a white light, not a yellow light, and it’s very bright. With two 4-foot LED “T5” lights, I can provide light for 2 trays. I have them on a timer for 16 hours/day.
That said, I know many people who simply place the plants in a sunny window, and although growth may not be optimal, it’s often enough to get them started.
Temperature
Room temperature works best for most vegetables that are started indoors. If your room is cold, you can buy an electrical heat mat for $15-$30, which will fit under one 10” x 20” tray.
Here’s how I start my seeds:
Seeds
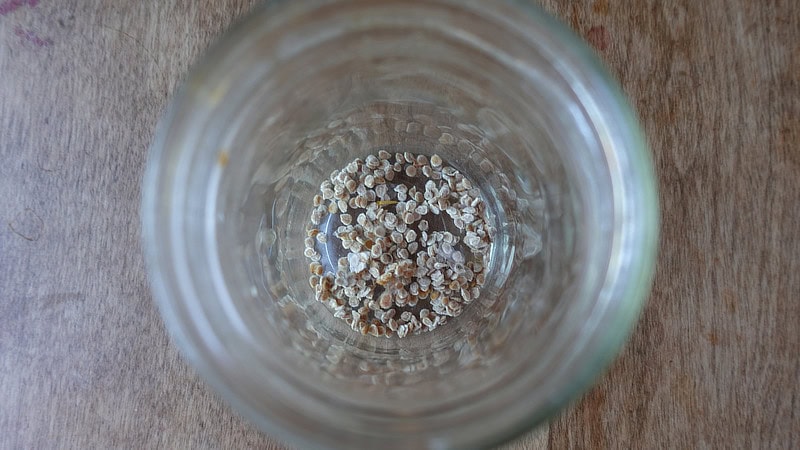
Although not necessary, I usually soak my seeds overnight because it speeds up the germination process.
I also add a small amount of liquid kelp and/or sea minerals to the soak water, so the seed has access to all the elements it needs to be optimally healthy at the beginning of its life – again, an optional step, but worthwhile.
Soil
Add your growing medium to the containers and place them in a tray with no holes (to catch water).
I like to water them now, before seeding, but many people water them after seeding.
Seeding
Most seeds are planted just under the surface of the soil, slightly deeper than they are thick. Place 1-3 seeds per container, ensuring they are just deep enough to be lightly covered with soil.
Once you gain more experience, you start to have an idea of which seeds germinate very well, meaning only one is needed per container, and which ones don’t germinate as easily, in which case two to three per container will give you a better chance of having a plant in each container. When more than 1 seed germinates in a container, you cut all but 1 of them off with a pair of scissors.
Light
I placed the trays under my lights immediately. Most seeds don’t require light to germinate, but even LEDs, which don’t generate much heat, produce a slight amount that speeds up germination for most plants.
I like to keep the lights 2-4” above the tops of the plants, which means they need to be raised higher every week or two as the plants grow.
Water
I water every couple of days, once I see the soil has dried out a little.
I don’t want the soil to stay saturated all the time because that can promote disease, but I also don’t want it to dry out too much because the plants don’t have a well-developed root system yet to absorb much water.
—
Hardening Off
When the plants are 4-8” tall, which often takes 4-8 weeks (although it does depend on the plant), and the temperature outside is appropriate (which varies a little for different plants), I harden the plants off.
Hardening off is the process of gradually acclimating plants to the sun and wind by taking them outside for increasing amounts of time each day.
There are many ways to do it, but a simple way to remember is to spend 1 hour outside on day 1, 2 hours on day 2, and so on.
Along with increasing time outside, there should be a little more time in the sun each day, starting with shade on the first day and gradually increasing the sun exposure.
After about a week of hardening off, plant them in the garden.